Posts

Showing posts with the label crafts

Thanksgiving Crafts

Image
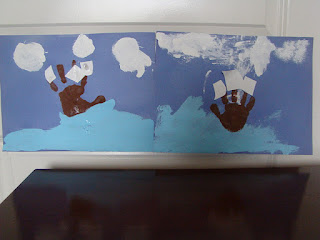
In honor of Thanksgiving we watched the Charlie Brown Thanksgiving! Read plenty of Thanksgiving books. And did the following crafts. We made handprint mayflowers and talked about the long voyage the pilgrims had. We used pinecones from our Big Bear trip to make turkey's and talked about how it is a more recent tradition but a good one at that. We use old toilet paper rolls to make corn cobs and talked about how hard it was to grow vegetables. We also made this pilgrim hat out of a clay pot to adorn our table. Lastly we made turkey handprints and talked about the things we were thankful for! (For more detailed instructions google each craft and you will find several sources).

Theme Thursday - 4th of July!

Image
Construction Paper Wind Socks! Take some blue paper. Different sized star cookie cutters. White and Red Tempera Paint. Use the cookie cutter as a stamp - dip it in paint and stamp it down on blue paper. Keep going until the page is full! Finished product a la Little C Roll your paper into a roll and staple the edges. Meanwhile cut some red white and blue yarn into pieces (your choice on length) Using a hole puncher. Punch two holes on the "top" of  your paper roll. They should be halfway on each side. Tie string through each hole to create a handle. Make a bunch of hole punches on the bottom of the roll. Then tie string on to all of these. Show mama your beautiful wind socks! *You could make these with any other theme we just chose the 4th because they make my house look festive!

Firefly Cards

Image
Here is a project we completed during our bug week as well!  Many thanks to I Can Teach My Child for her wonderful ideas (including this one)! Didn't think to take a picture of me cutting an 8.5 x 11 piece of black construction paper in half and then folding it in half to make a card but that is the background for this project - so start there! Using a high-lighter color in two mailing labels. Using a pencil color in two mailing labels. Add to pencil mailing labels in a cross over fashion to the front of the card. Place one of  the high lighted mailing labels centered over the pencil ones. Glue on google eyes and use puffy paints for the mouth and antennae. On the inside use two plain mailing labels and the other high lighted one to make the cute saying. We also used plain mailing labels to have the girls sign their names on the cards. Add some star stickers. Voila a completed card! And yes we will be using these as Father's Day Cards! Happy craftin...

Dancing Spider Craft

Image
Using the lid off a large container and some black paper. Trace the circle using chalk. Cut out the circle and trace a line from the edge up about 4 inches towards the center. Then cut along this line. Start making legs by marking off every 1 to 2 inches with chalk on another black paper. Do the same thing on the opposite side of paper. Connect the lines so that you have eight strips. Have your child cut each line to make a strip. Add google eyes using glue. Show your child how to accordion fold the leg strips. Using glue add four legs to each side of the spider. At the opening from the slit you cut - overlap the edges and staple together (it creates a three dimensional spider) Take an extra large rubber band.  This one was about 9 inches in diameter. Cut the rubber band. Attach each end to the side of the spider* We ended up thinking it was better to staple to the tooshie end or where you overlapped the slit and making it hang rather than having a handl...

Painting a Bird house

Image
Here is a project we did a couple weeks ago - painting a wood bird house we picked up at Michael's!  Big C loved this project and can't wait to paint more in the future! An old egg carton as a paint palette. One paint for each egg holder. The birdhouse Big C picked out! The finished project! Back & Side View Other Side View As a mom it can be really tough to let your kid's be as creative as they want (at least when you are a Type A personality like me) it has taken many projects to just allow her to do what she wants.  My personality would demand each piece of the house be colored in and that the colors "match" so to speak.  Once I let go of that and let her do her thing I am able to LOVE her projects and her explanations: The front is brown so that it looks like a tree or nest so that they will think it is a safe home.  The sides and back have colors like flowers and sunshine and clouds.  She didn't just paint it as I used to think she really th...

Photo Frame Project

Image
A craft Big C did all on her own (well with adult supervision but no adult intervention)! We took a wood fram from Michaels ($1), Some leftover paint from the Big C in the bathroom, Flowers from the gardland in Big C's room, 2 wood bows from who knows when and a bit of glue.  Add a 3 year old and voila: She did not want to paint the edges of the frame (hend the wood bottom) and she doesn't want to use it as a frame right now - she said maybe when she gets her pictures taken again she will put one of her and Little C. It took a lot of talking down for my perfectionist self to not help her but she did this whole project on her own even picking out the frame and decorations to the clean up!  I love it: $1 and an hour of determination for a masterpiece! Enjoy, Ash of All Trades

Valentine Craft

Image
Yes I know this is delayed but wow this rainy weather has made my mind turn to mush!  Here is a gross motor skill craft I did with the girls last week (or maybe two weeks ago). We tore up a lot of construction paper: Then I handed out glue sticks (very cautiously and on a day where I had many patience).  They were supposed to glue the scraps of paper to a construction paper heart (that mommy had precut) - Caylee however was in shock that I handed her a glue stick and proceeded to stab the paper then look at me with huge eyes. The finished projects did turn out adorable! We hung them on the bulletin board in our school room.  I hope to give a photo tour of my schoolroom soon (it is a work in progress since Chloee technically hasn't started "school") but it is coming along adorably! For now, Ash of All Trades

Ship Ahoy!

Image
Thanks to my wonderful brother's annual Disney pass we receive Disney's Family Fun Magazine for free!  This magazine is mighty awesome and I highly recommend it for anyone who either has kids or works with them.  There are some great short articles on kids and lots of activities and crafts.  Most importantly tons of their crafts use regular household items! So we decided to try and make the boat from the Valentines issue.  Well let's just say that this project was a little over Chloee's head and mommy spent almost 2 hours finishing it...eeek. But we had a great time and it ended up adorable. We started by taping a piece of swiffer box to an empty (and clean) Half Gallon Carton: Then we covered that in construction paper (which didn't go as planned).  This is when Chloee started getting bored -so I let her color and punch out hearts. Anywho the instructions are in the mag or here . Our finished project: The girls are thrilled with the boat and pl...